
Heel Repair Guide: Fix Your Boots & Extend Their Life
Don't let a worn heel ruin your favorite boots. Learn professional repair techniques, DIY solutions, and cost-saving tips to keep your footwear in top shape for years.
START READINGWhy Heel Repair Matters: Worn heels don't just look bad—they affect your posture, gait, and overall foot health. A timely repair can save you from expensive replacements and keep your boots comfortable and safe. Whether you own rugged work boots or elegant leather boots, understanding heel repair is an essential skill for every boot owner.
Understanding Boot Heel Construction
Before diving into repairs, it's important to understand what you're working with. Most boot heels consist of several layers: the heel base (or heel block), the heel lift (the bottom layer that makes contact with the ground), and sometimes a heel counter for structural support. The heel lift is typically the first component to wear out, especially if you walk on hard surfaces regularly.
Different types of boots feature different heel constructions. For example, cowboy boots often have stacked leather heels, while hiking boots might use rubber or polyurethane components. Understanding your boot's heel type will determine the best repair approach.
Common Heel Problems and Their Causes
Heel damage can manifest in several ways, and identifying the specific issue is the first step toward an effective repair. Here are the most common problems boot owners face:
1. Worn-Down Heel Lifts
This is the most frequent issue. The bottom layer of your heel gradually wears away from constant friction with the ground. If you notice uneven wear—perhaps the outer edge of your heel is more worn than the inner—this could indicate a gait issue that might benefit from arch support or orthopedic boots in the future.
2. Cracked or Broken Heels
Cheap materials or excessive stress can cause heels to crack or break entirely. This is particularly common in budget boots where lower-quality materials are used. If the heel block itself is compromised, professional repair or replacement may be necessary.
3. Loose or Detached Heels
Over time, the adhesive or nails holding your heel in place can fail. You might notice a wobble or clicking sound when walking. Addressing this early prevents further damage to the boot's structure.
4. Squeaky Heels
A squeaky heel often indicates internal damage or loose components. While not always a sign of serious damage, it's annoying and worth fixing. Sometimes it's as simple as tightening screws or applying adhesive.
DIY Heel Repair: Step-by-Step Guide
For minor heel damage, a DIY repair can save you money and time. Here's how to tackle common heel issues at home:
Tools and Materials You'll Need
Before starting any repair, gather these essential items:
- Replacement heel lifts (available at shoe repair shops or online)
- Shoe glue or contact cement (specifically designed for footwear)
- Sandpaper (medium and fine grit)
- Utility knife or box cutter
- Hammer and small nails (for securing heels)
- Clamps or heavy objects for applying pressure
- Clean cloth and rubbing alcohol for surface preparation
Step 1: Assess the Damage
Examine the heel carefully. If the damage is limited to the heel lift (the bottom layer), a simple replacement might suffice. However, if the heel block is cracked or the damage extends into the boot's structure, consider consulting a professional or exploring sole replacement options.
Step 2: Remove the Old Heel Lift
Use your utility knife to carefully pry off the worn heel lift. Work slowly to avoid damaging the heel block underneath. If the lift is glued on, you might need to apply gentle heat (from a hairdryer) to soften the adhesive.
Step 3: Prepare the Surface
Clean the exposed heel block with rubbing alcohol to remove any old adhesive, dirt, or debris. Use sandpaper to roughen the surface slightly—this helps the new adhesive bond better.
Step 4: Cut and Fit the New Heel Lift
Trace the shape of your old heel lift onto the replacement material, or use pre-cut lifts that match your boot's size. Trim as needed for a precise fit. The new lift should align perfectly with the edges of your heel block.
Step 5: Apply Adhesive
Apply a generous layer of shoe glue or contact cement to both the heel block and the new heel lift. Follow the manufacturer's instructions for drying times—some adhesives require you to wait until they're tacky before joining the surfaces.
Step 6: Attach and Secure
Press the new heel lift firmly into place. For extra security, drive a few small nails through the lift into the heel block (if the design allows). Use clamps or place heavy objects on the boot to maintain pressure while the adhesive cures—usually 24 hours.
Step 7: Finishing Touches
Once the adhesive is fully cured, use sandpaper to smooth any rough edges or excess material. If you're repairing leather boots, you might want to apply a matching edge dressing to blend the repair seamlessly.
When to Seek Professional Heel Repair
While DIY repairs work well for minor issues, some situations call for a professional cobbler. Consider professional help when:
- The heel block itself is cracked or broken
- Multiple layers of the heel need replacement
- Your boots have significant structural damage
- You're dealing with high-end or designer footwear
- You lack the tools or confidence to DIY
Professional heel repair typically costs between $15 and $50 per pair, depending on the complexity and your location. This is often far less expensive than replacing quality boots, especially if you own premium boots or luxury boots.
What to Expect from a Cobbler
A skilled cobbler will assess the damage, recommend the best repair approach, and often use higher-quality materials than what's available for DIY. They can also address related issues like stitching repair or zipper repair if needed. Many cobblers offer same-day or next-day service for simple heel replacements.
Cost-Saving Tips for Heel Repair
Boot repair doesn't have to break the bank. Here are practical ways to save money:
- Act Early: Fixing a worn heel lift before it damages the heel block is much cheaper than a full heel replacement.
- Invest in Quality Boots: Boots from our best value guide often use higher-quality heel materials that last longer.
- Use Heel Savers: These inexpensive plastic or rubber caps slip over your heel to protect it from wear. They're especially useful for dressy boots worn on hard surfaces.
- Rotate Your Boots: Giving your boots a rest between wears allows them to dry and reduces heel wear. Learn more in our boot maintenance hub.
- DIY When Possible: Simple heel lift replacements are well within the reach of most boot owners.
Preventing Heel Damage: Proactive Care
The best heel repair is the one you never need. Here's how to prevent heel damage before it starts:
Regular Cleaning and Conditioning
Dirt and grit act like sandpaper on your heels. Clean your boots regularly—especially after wearing them in muddy or dusty conditions. For leather boots, follow our leather cleaning guide. If you own suede boots or nubuck boots, use the appropriate cleaning methods for those materials.
Proper Storage
Store your boots in a cool, dry place away from direct sunlight. Use boot storage covers or boot bags to protect them from dust and moisture. For long-term storage, consider boot room organization solutions that keep your footwear accessible and protected.
Use Protective Accessories
Accessories like heel cushions can absorb shock and reduce wear on your heels. If you frequently walk on hard surfaces, consider adding heel savers to your rotation. And don't forget boot guard sprays for an extra layer of protection against the elements.
Address Gait Issues
Uneven heel wear often indicates a gait imbalance. If you notice your heels wearing more on one side, consider consulting a podiatrist. They might recommend orthopedic boots or arch support to correct your stride and extend the life of your footwear.
Seasonal Heel Care
Different seasons bring different challenges for boot heels. In winter, salt and ice can be particularly damaging—especially to snow boots and insulated boots. Rinse your boots after exposure to road salt, and consider waterproofing them for added protection.
In rainy seasons, rain boots and waterproof boots are your best friends. But even these need care—check out our rubber boot wash guide for maintenance tips. And for summer adventures, make sure your hiking boots and tactical boots have well-maintained heels for optimal traction on trails.
Extending Your Boot's Lifespan
Heel repair is just one aspect of comprehensive boot care. To get the most out of your footwear investment, explore our full range of guides:
- Break-In Guide - Start your boots off right
- Fit & Measurement - Ensure proper fit to reduce wear
- Care & Maintenance - Your central resource for boot care
- Sole Replacement - When heels and soles both need attention
- Stitching Repair - Fix loose seams before they become major issues
- Shopping Tips - Choose boots that are built to last
For those looking to build a versatile collection, our boot styles overview and buying guides can help you choose boots that match your lifestyle and needs. And if you're interested in styling, don't miss our style ideas and outfit pairing guides.
Recommended Products for Heel Repair & Boot Care
⚠️ AFFILIATE DISCLOSURE: This website contains affiliate links. As an affiliate Associate, we earn from qualifying purchases. If you make a purchase through these links, we may receive a small commission at no additional cost to you. Read our full affiliate policy.

Dr. Scholl's Severe Cracked Heel Repair Restoring Balm 2.5oz, with 25% Urea for Dry, Cracked Feet, Heals and Moisturizes for Healthy Feet
Check price on Amazon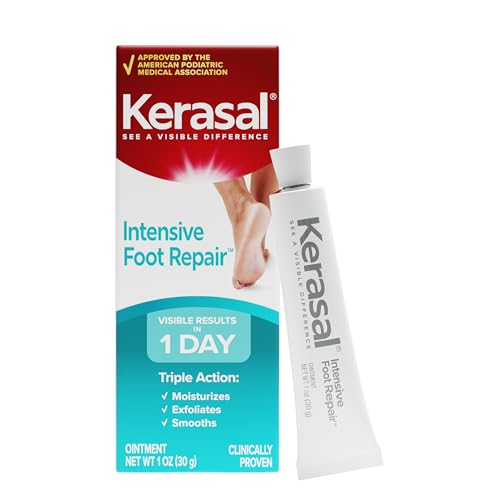
Kerasal Intensive Foot Repair Ointment, Smooth Rough Feet, 1 oz | Foot repair ointment with Urea and Salicylic Acid helps smooth dry, cracked feet and deliver visible results in 1 day.
Check price on Amazon
TEAWOO Moisturizing Heel Socks - 6 Pairs for Dry Cracked Feet | Toeless Gel Socks for Hydration and Repair, Soften and Hydrate Dry Cracked Feet Heels, Gel Socks for Dry Cracked Feet
Check price on Amazon
Kerasal Nighttime Intensive Foot Repair,Smooth Cracked Heels, Ointment, 1oz | Nighttime ointment with Urea, Salicylic Acid, lavender helps soften and smooth dry, cracked feet while you sleep.
Check price on Amazon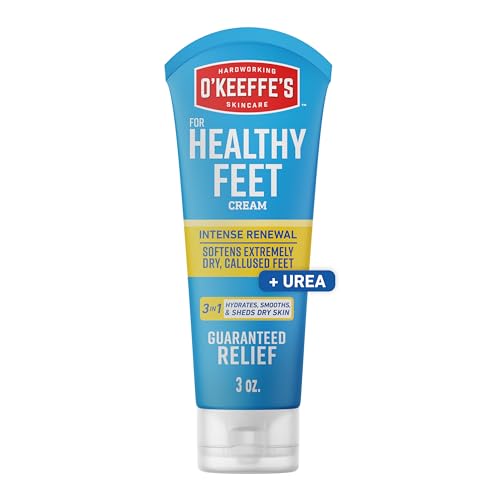
OKeeffes Healthy Feet Intense Renewal Cream, 3 oz Tube, 1-Pack | Chemically Exfoliates & Softens Extremely Callused Dry Feet, Urea & Alpha Hydroxy Acid Formula, Cracked Heel Relief
Check price on Amazon
Dr. Scholl's Severe Cracked Heel Repair Foot Cream, Urea Cream, 3-Pack | Softer heels, foot balm for cracked heel, 25%, Epsom salt, dry feet treatment, safe for diabetics
Check price on Amazon
Onyx Professional Cracked Heel Treatment, Repairs Dry Heels, Coconut, 1 pk | Cracked Heel Repair Balm Stick, Dry Cracked Feet Treatment, Moisturizing Foot Balm, No Mess Like Foot Cream or Foot Lotion
Check price on Amazon
HTZNHXT Shoe Heel Repair, 4 Pairs Inside Shoe Heel Patch Pad for Holes | Self-Adhesive, Heel Repair, Hole Repair, For Sneaker, Leather Shoes
Check price on AmazonFrequently Asked Questions About Heel Repair
How often should I check my boot heels?
Inspect your heels every few weeks, especially if you wear the same pair daily. Look for uneven wear, cracks, or loose components. Early detection can save you from costly repairs down the line.
Can I repair heels on all types of boots?
Most boots can be repaired, but the approach varies. Leather boots, work boots, and cowboy boots are generally very repairable. Some athletic-style boots or those with molded soles may be more challenging. For specific guidance, check our guides on work boots, cowboy boots, and leather boots.
Is it worth repairing cheap boots?
It depends. If the boots are comfortable and the damage is minor, a small repair investment can extend their life. However, if the boots are falling apart overall or the repair cost approaches the price of new boots, it might be time to upgrade. Our budget boots guide can help you find affordable replacements.
How long does heel repair last?
A professional heel replacement can last as long as the original—often 1-2 years with regular wear. DIY repairs vary based on materials and technique. Using quality adhesives and proper installation techniques will maximize longevity.
Can I prevent heel wear on dress boots?
Yes! Heel savers are particularly useful for dress boots. You can also rotate your footwear and avoid wearing the same pair on consecutive days. For more tips, see our dressy boot outfits guide.
Final Thoughts: Keep Your Boots Walking Strong
Heel repair is a skill that pays for itself many times over. Whether you choose to DIY or visit a professional cobbler, addressing heel issues promptly keeps your boots comfortable, safe, and stylish. Remember that proper care—from regular cleaning to smart storage—prevents many heel problems before they start.
Your boots are an investment. Treat them well, and they'll serve you faithfully for years. Explore our boot maintenance hub for more care guides, and when it's time to expand your collection, browse our buying guides and boot types overview to find your next perfect pair.